


Create a company workspace
Setting up a workspace in New Expensify is the first step to managing company expenses. This guide walks you through creating your workspace, inviting team members, setting up categories, enabling features, and more. Your first workspace includes a free 30-day trial and access to a Setup Specialist via the #admins chat room or Concierge in your Inbox.
Create a workspace
Workspaces let you control expense policies, manage company cards, and connect to accounting software. Each workspace includes its own settings, rules, and integrations.
To create a workspace:
- In the left-hand menu, select Workspaces.
- Click New workspace.
- Click Name to give your workspace a name.
- Click Default Currency to set your preferred currency.
Connect to accounting software
Link your workspace to QuickBooks Online, Xero, NetSuite, or Sage Intacct for seamless data sync.
Import: Syncs your chart of accounts for accurate expense coding
Export: Sends approved reports to your accounting platform
Integration guides
Add Categories
Categories help organize expenses and can be synced from your accounting software.
How to manage categories:
- In the left-hand menu, select Categories.
- To disable a category, click it and toggle it off.
- To add a category, click Add Category, enter a name, and click Save.
Learn more about expense categories
Note: Categories are enabled by default. To disable all categories, go to More Features and toggle off Categories.
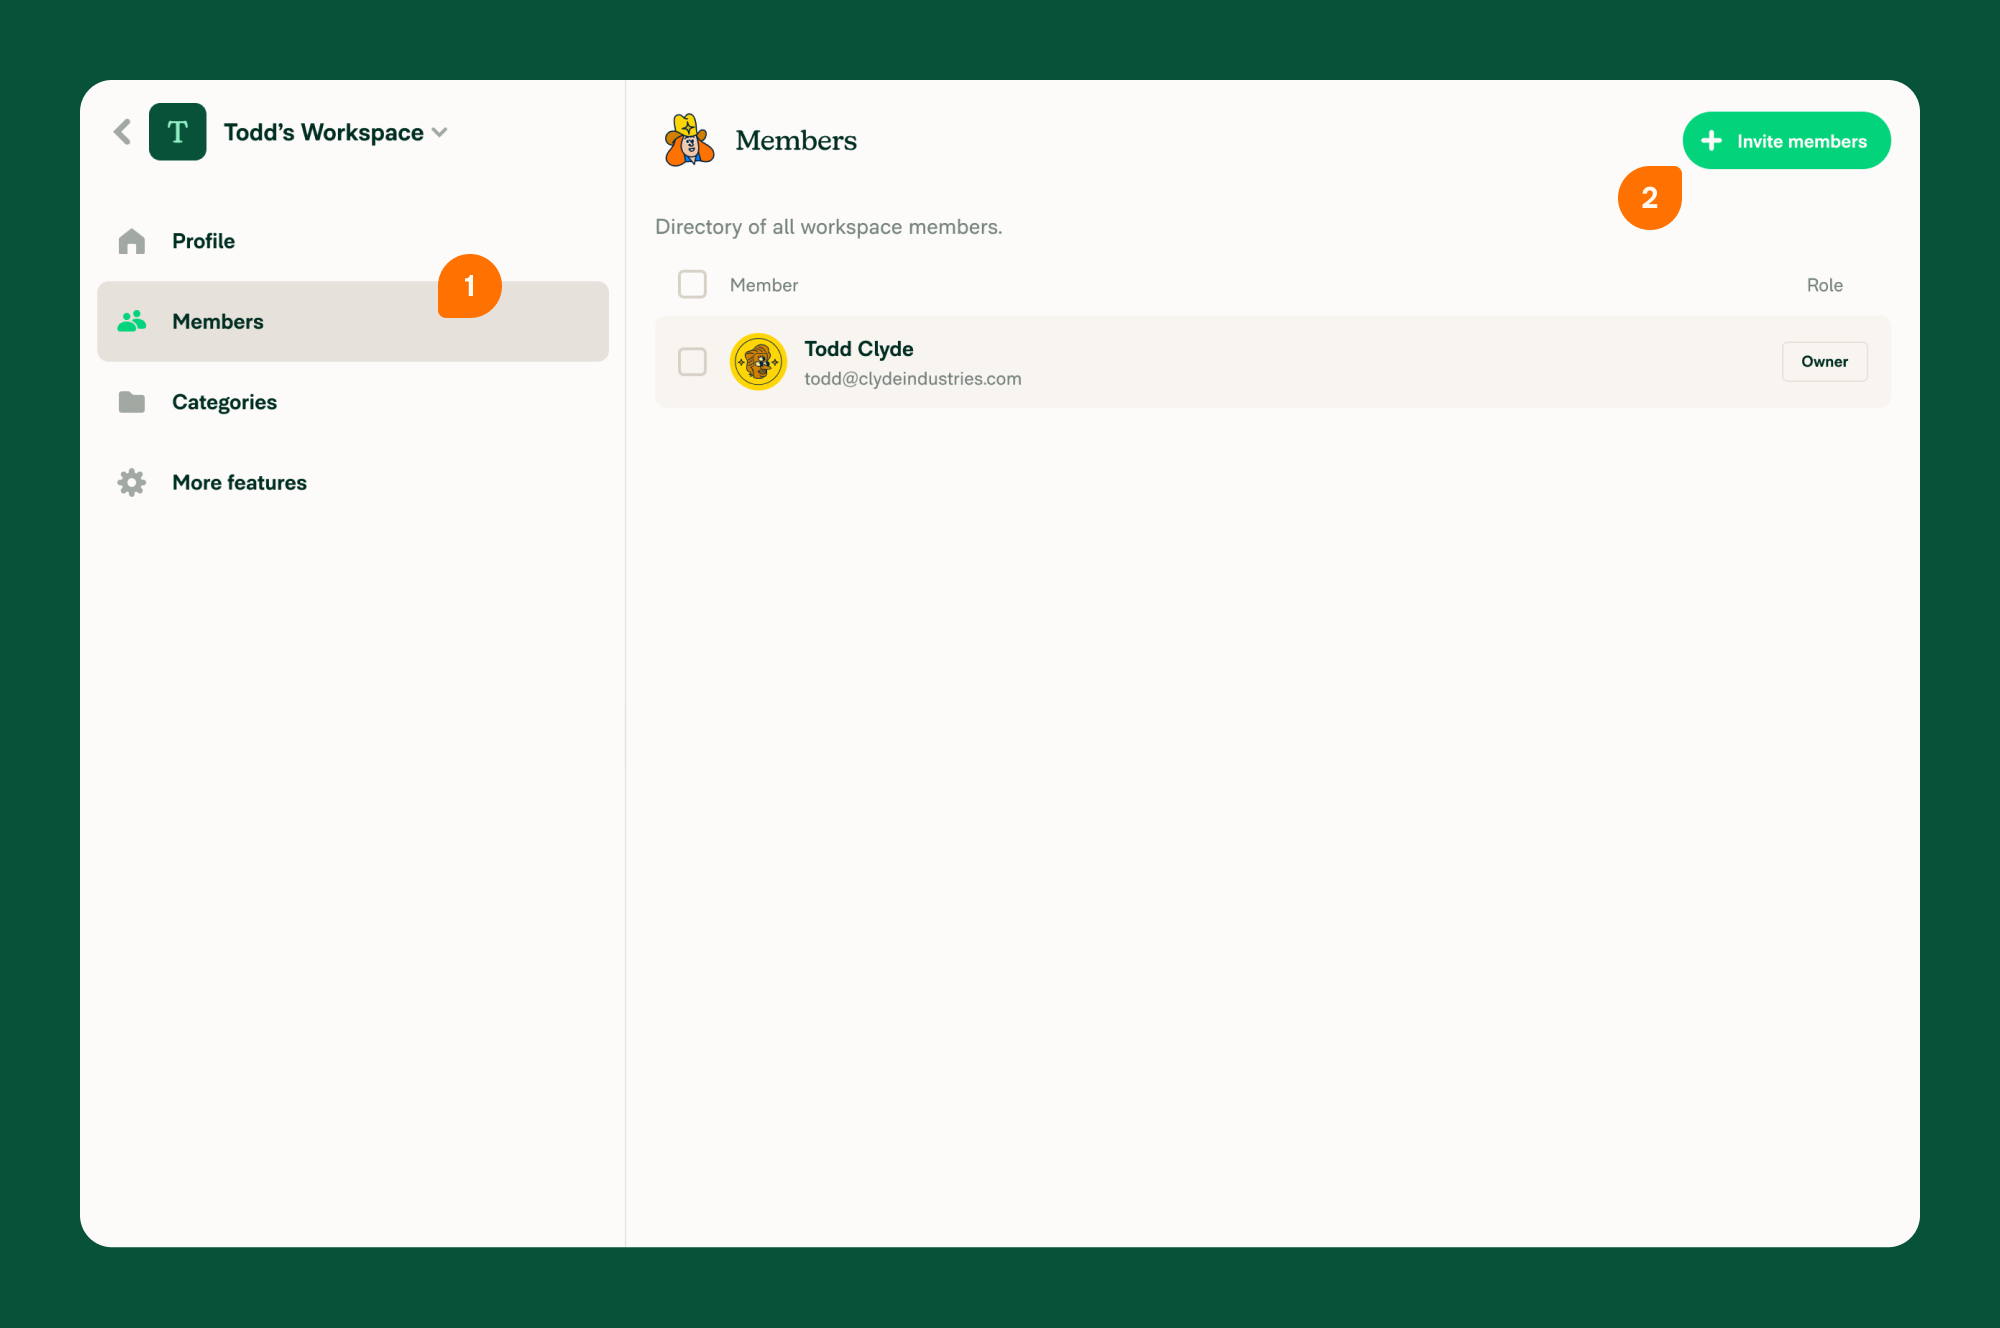
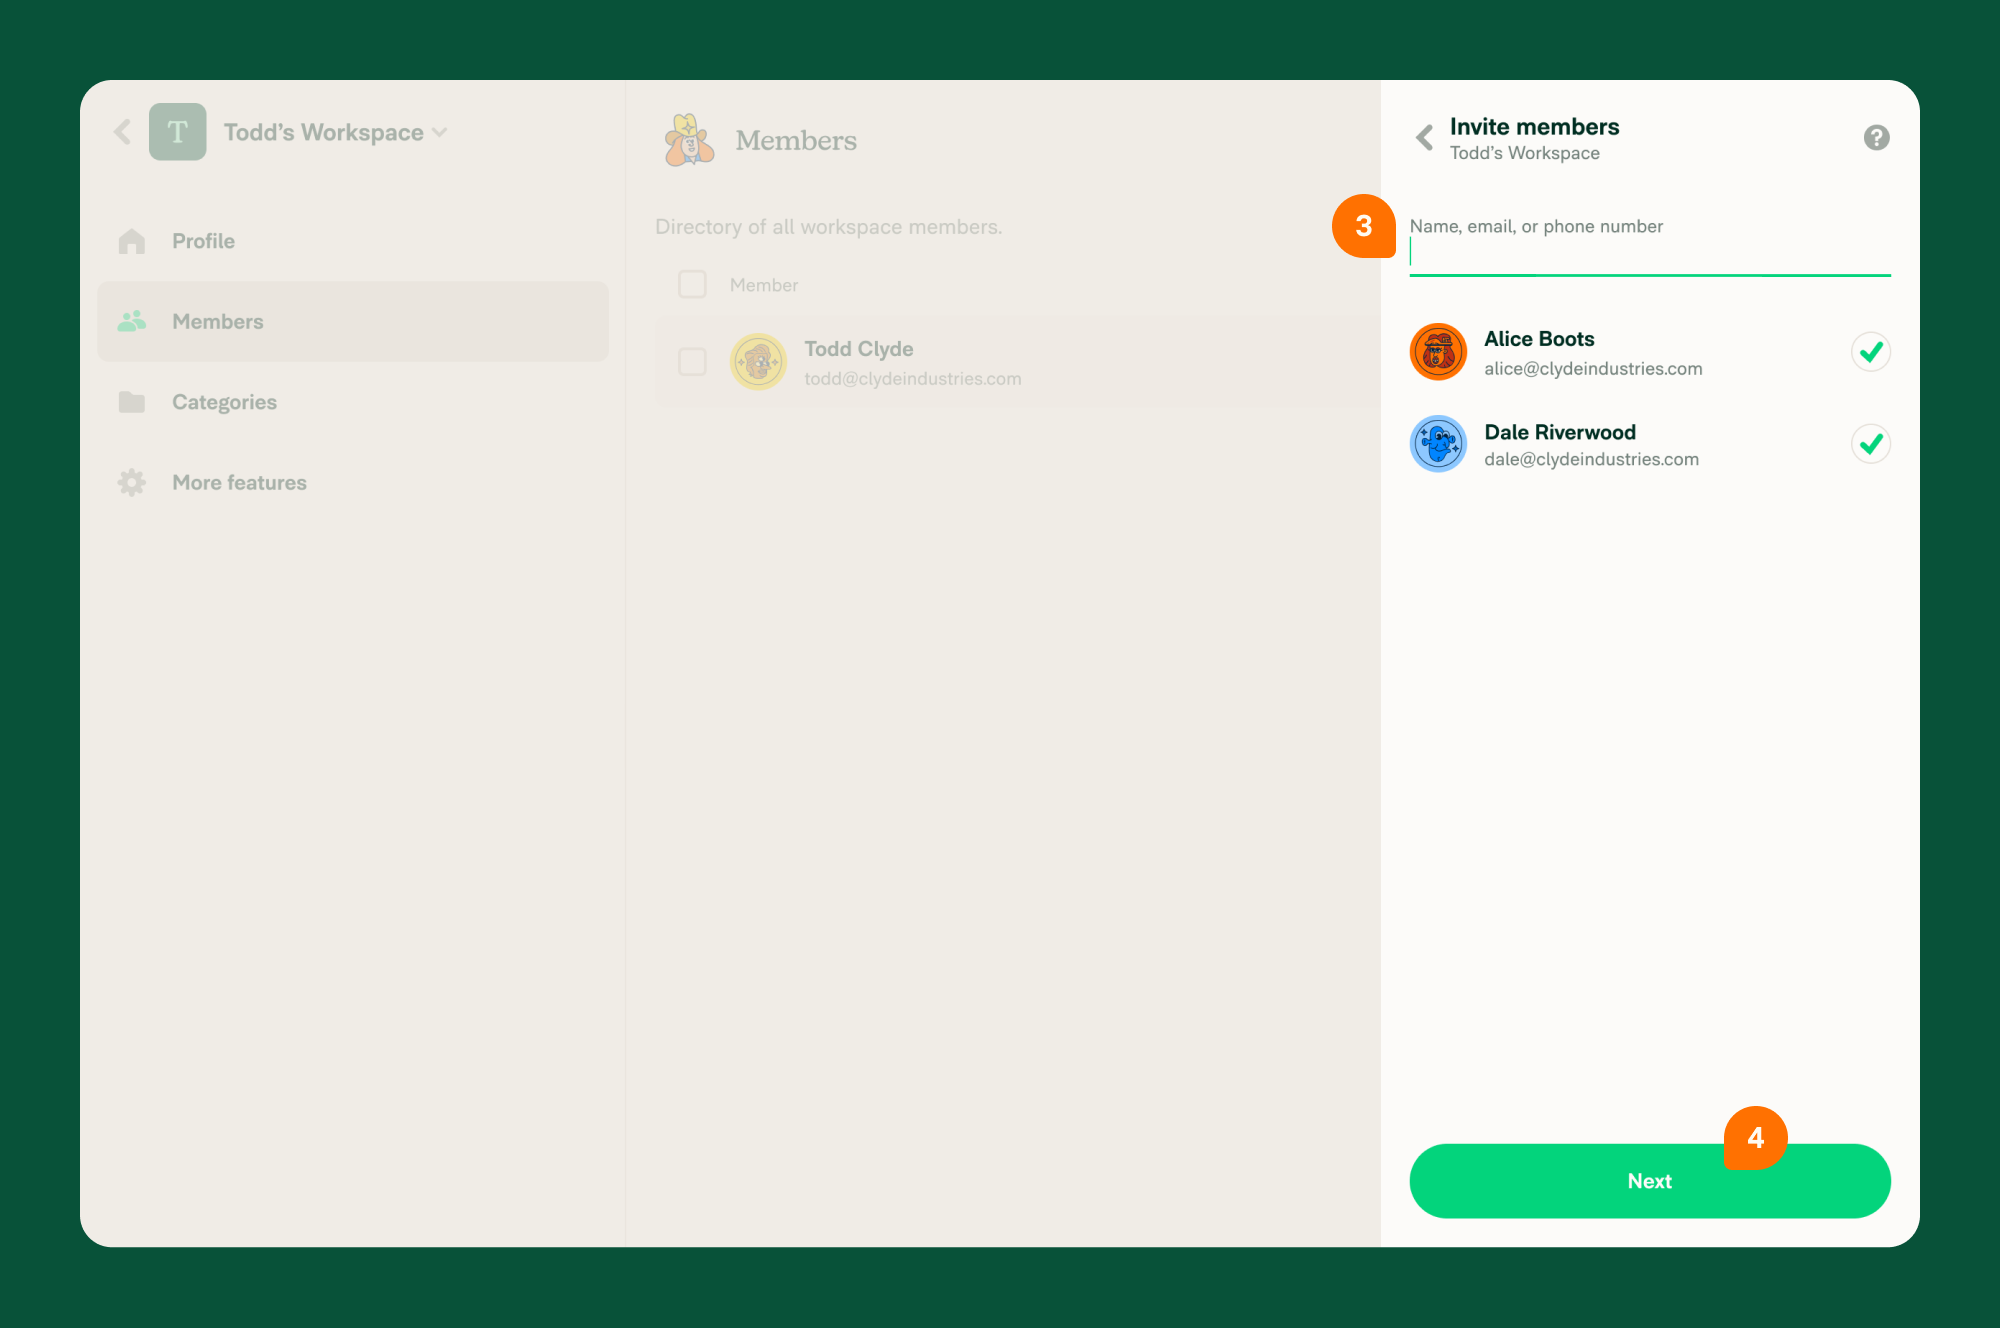
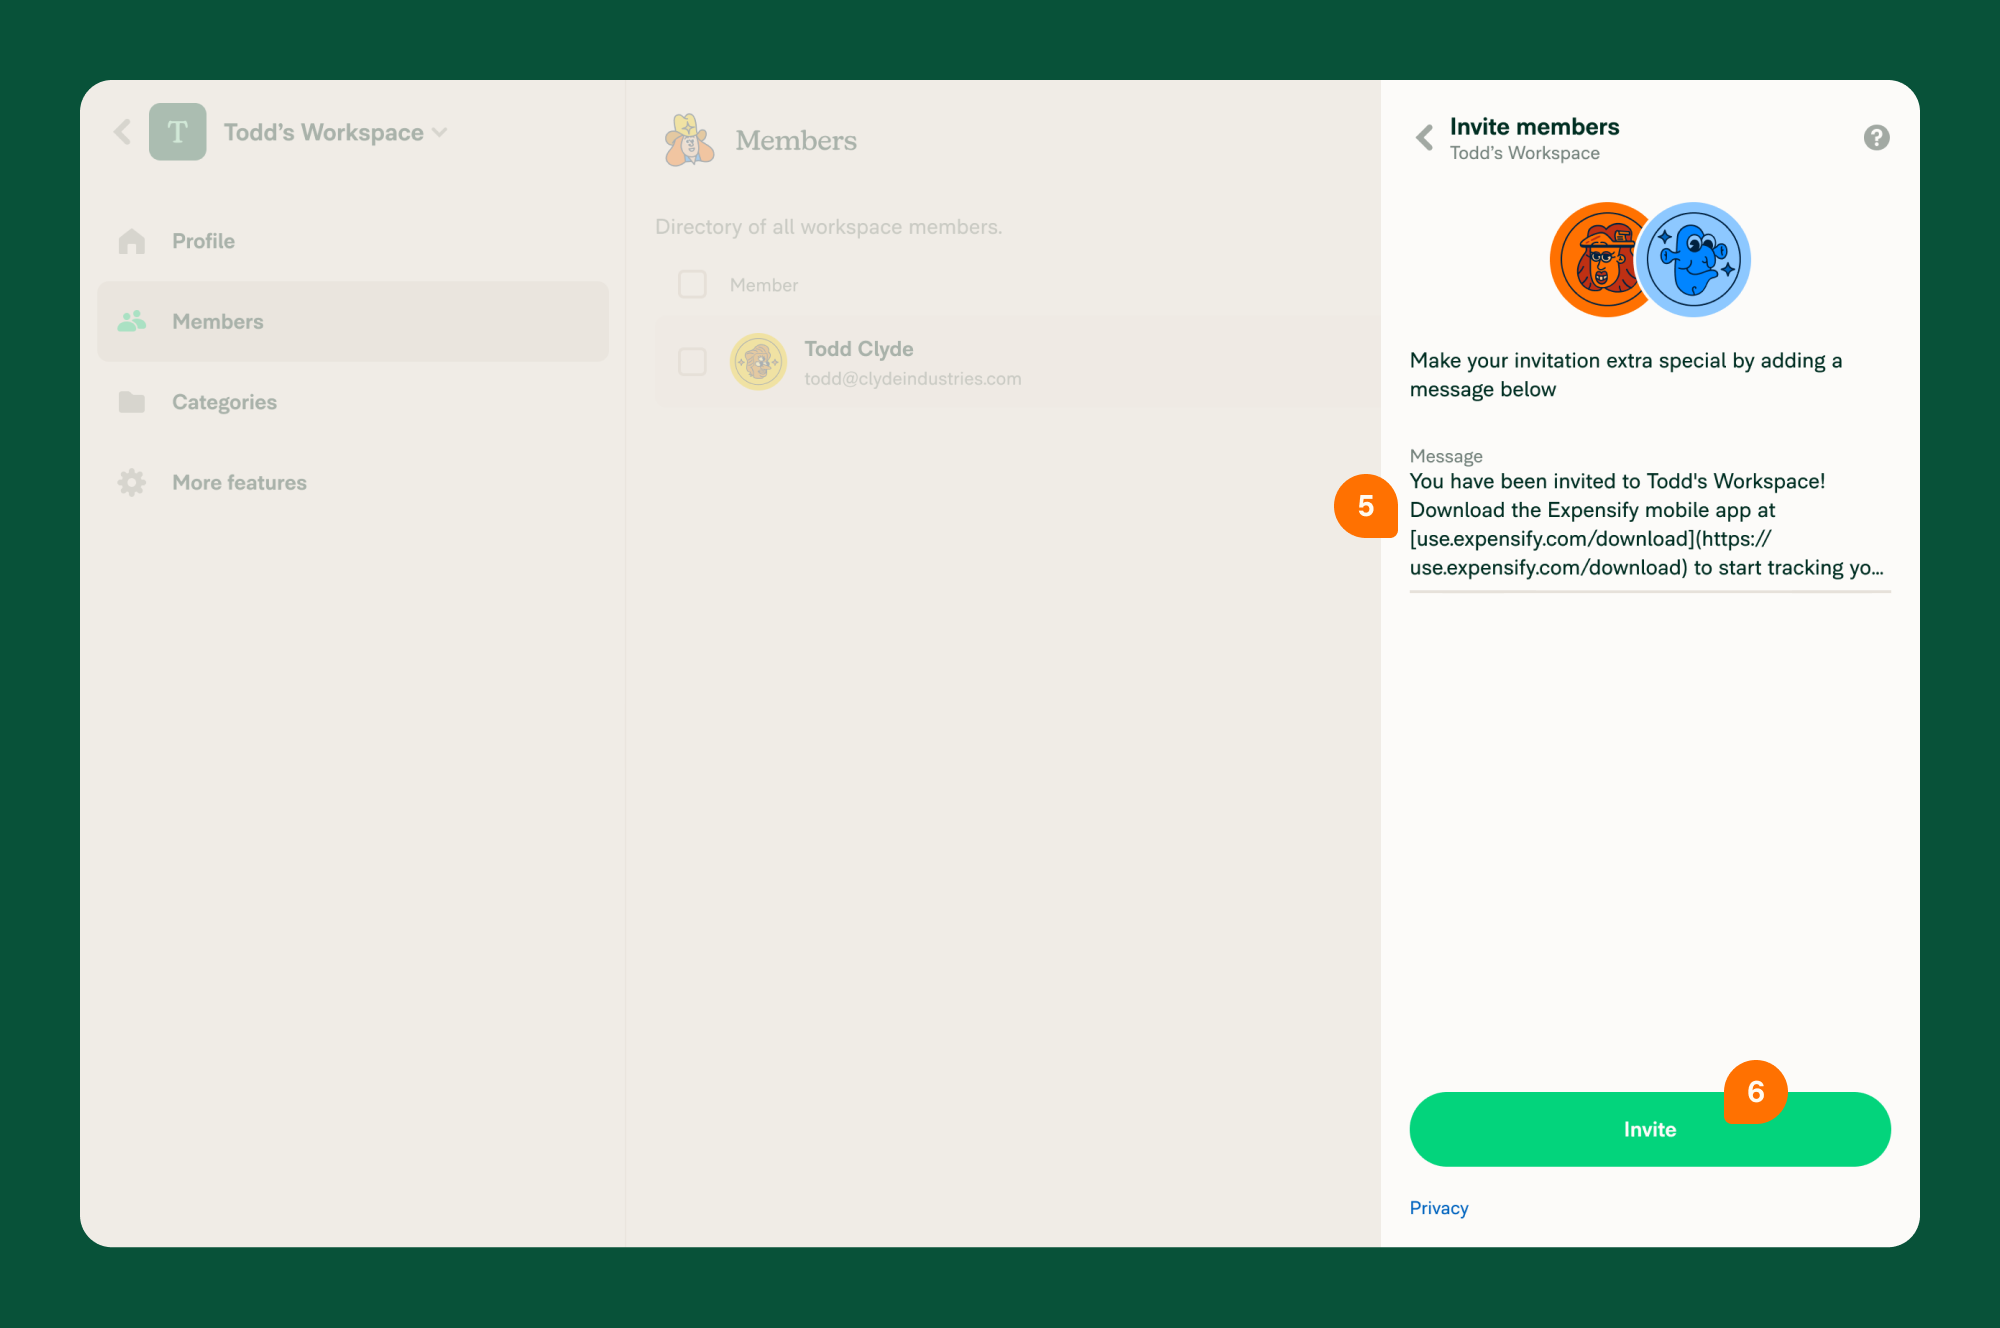
Invite members
- In the left-hand menu, select Members.
- Click Invite Member.
- Search by name, email, or phone number.
- Click Next, optionally add a message, then click Invite.
💡 Tip: You can also invite members from the workspace Profile page by clicking Share to get the invite link or QR code.
Assign Admins
Admins can manage settings and approve all reports. Here’s a comparison:
| Member | Admin |
|---|---|
| ✓ Submit their own reports | ✓ Submit their own reports |
| ✓ Approve reports assigned to them | ✓ Approve all workspace reports |
| ✓ View all workspace reports | |
| ✓ Edit workspace settings |
How to assign admins:
- In the left-hand menu, select Members.
- Click a member’s name.
- Click Role and select Admin.
Set Up Approval Workflows
Approval workflows help automate expense report reviews.
Enable Approvals
- In the left-hand menu, select Workflows.
- Toggle Add Approvals on.
Configure a Default Workflow
- In the left-hand menu, select Workflows.
- Under Expenses from Everyone, set a First Approver.
- Add more approvers if needed.
- Click Save.
Note: You must set a default workflow when approvals are enabled.
Create Custom Workflows
- In the left-hand menu, select Workflows.
- Click Add Approval Workflow.
- Choose a member and their first approver.
- Click Next, then add more approvers if needed.
- Click Add Workflow.
Enable Additional Features
Customize your workspace further with these features:
How to enable features:
- In the left-hand menu, select More Features.
- Toggle on the features you want to use.
- Configure each by clicking its new menu item.
Monitor Free Trial
Track your trial under Account > Subscription:
- View your start and end dates
- Get help from Concierge or your Setup Specialist
- Add a billing card to continue using Expensify